When you buy a domain from a registrar, you are essentially buying the rights to the domain name, and the ability to control DNS records associated with it. Since I had dealt with GoDaddy in the past, this was the registrar I went with when I purchased ericpark.dev. While I know I could figure out the Domain API with GoDaddy, I already have working scripts to update Digital Oceans DNS API, and since I still intend on hosting services in their cloud, I decided to use them for my DNS needs too.
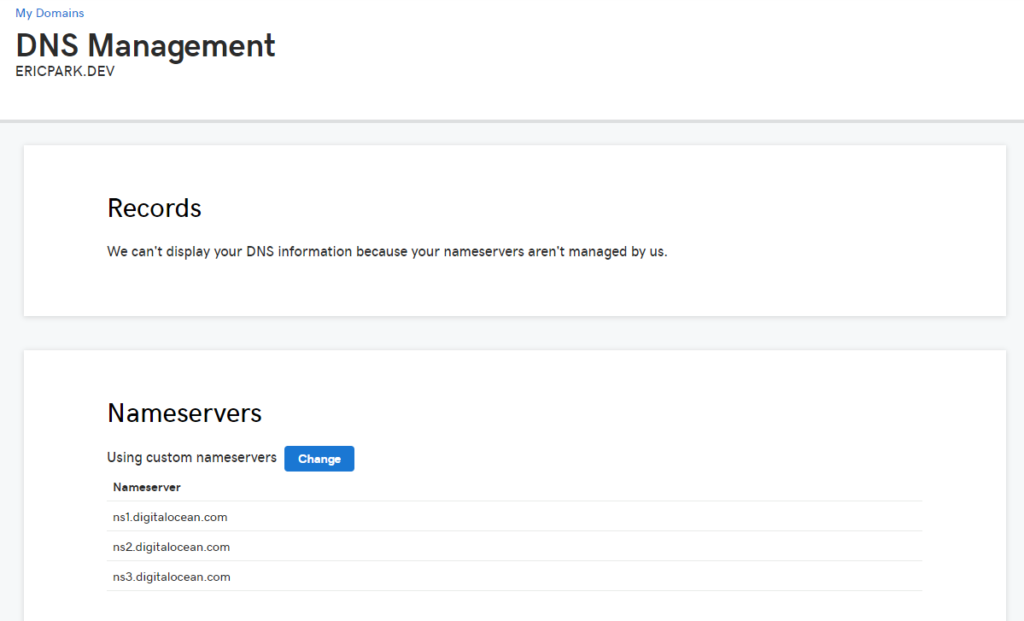
This is relatively easy to configure, I am essentially configuring GoDaddy’s DNS to hand over responsibility to Digital Ocean. I’ve gone into the DNS management in GoDaddy, and set the name servers to Digital Ocean:
With this complete, I head over to DO to setup my initial DNS records:
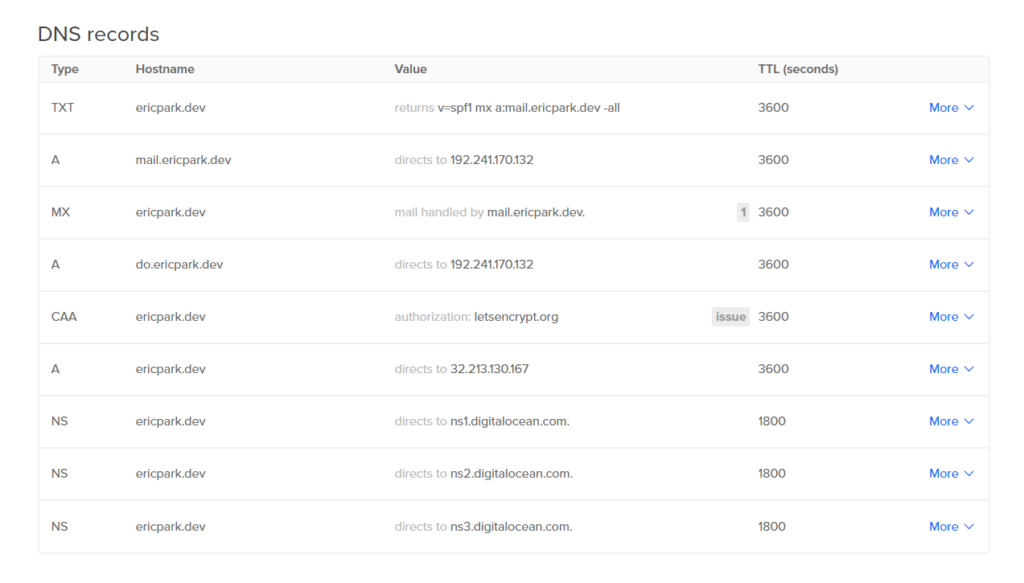
The records of importance here are:
- The A record to ericpark.dev. This simply points to the IP that my domain can be found at.
- The CAA record which states letsencrypt.org is my CA
To be fair all we need to get started the A record, but as I explored TLS best practices. I created the CAA record as well. This essentially tells everyone that Let’s Encrypt is the only CA that should issue a certificate for my domain.
This is a good moment to talk about Dynamic DNS. Setting these DNS records up manually is great, and it gets the job done, but what happens if my IP address changes? For some ISPs this rarely happens, but its good to be prepared. Previously, if my IP changed and I was using a statically configured sub-domain name. I would lose the ability to connect to my machines. DNS would no longer be correct when it told me which IP was mine. Enter Dynamic DNS. The idea here is that we periodically, preferably when a change is detected, update the DNS servers with the latest IP. It’s on my todo list to make this more reliable, but I have configured a script to be run at 4 AM each day to update the Digital Ocean DNS servers with my latest IP.
#!/bin/sh

# Your domain name
domain="ericpark.dev"

#record id to update
record="xxx"

# api key
api_key="xxx"

# lookup ip
ip="$(curl http://ipecho.net/plain)"
echo content="$(curl \
         -k \
         -H "Authorization: Bearer $api_key" \
         -H "Content-Type: application/json" \
         -d '{"data": "'"$ip"'"}' \
         -X PUT "https://api.digitalocean.com/v2/domains/$domain/records/$record")"
It boils down to the following. Get your API key from DO, and get the record ID you want to keep updated with the /domains/$domain/records API call, and populate the script.
With this configured, when you enter ericpark.dev into your browser, it is correctly told to find my server at my current IP. In the next post we finally setup Docker and deploy WordPress.